Northern Lights Camera Settings Explained
Senior Editor
For aurora, set the widest aperture your lens has (f/2.8 or wider), ISO between 3200 and 8000, white balance near 3500K and RAW. Then choose a shutter speed from under a second to about 20 seconds depending on how fast the lights are moving. Of those numbers, shutter speed is the only one you will change much during a night.
You need a reference because published guides disagree by a wide margin. Visit Norway starts beginners at f/2.8, ISO 1600 and 15 seconds. Capture the Atlas recommends ISO 3200 to 8000 and much shorter exposures for active displays. Neither is wrong. They are describing different skies, and the rest of this page explains which numbers fit which sky.
Set the controls in this order, because each one limits the next.
Aperture comes first and stays put. Use the widest opening the lens has. Nothing in an aurora frame is close enough to need depth of field, so a smaller aperture only costs you light. DPReview notes that f/1.8 gathers 2.5 times more light than f/2.8. If you own a fast prime, this is where it earns its place.
Shutter speed follows the aurora, not the stars. A long exposure smears moving curtains into a flat green wash. "The stronger, more dynamic, and brighter the Northern Lights are, the faster the shutter speed," writes Dan Zafra of Capture the Atlas. When the display speeds up, you shorten the exposure.
ISO makes up the difference. Every second you take off the shutter has to come back through ISO. DPReview's rule is to set ISO to "the highest level that gives you acceptably clean results." Capture the Atlas puts full-frame bodies at 5000 to 12,800 and recommends that crop-sensor and entry-level cameras stay at 6400 or below. Bright moonlight moves everyone down to 800 to 3200.
White balance and file format are set once. Auto white balance tends to add an orange cast to night skies, according to photographer Jeroen Van Nieuwenhove. He fixes it manually between 3500K and 4500K. Capture the Atlas uses 3500K. Every source here recommends shooting RAW, which lets you correct color and exposure afterward without losing quality.
Your camera also sees more than you do. NOAA's aurora tutorial notes that modern digital cameras are often more sensitive than the human eye, and that faint aurora can look whitish or gray to the eye before a camera shows its color. So take a test exposure even when the sky looks empty.
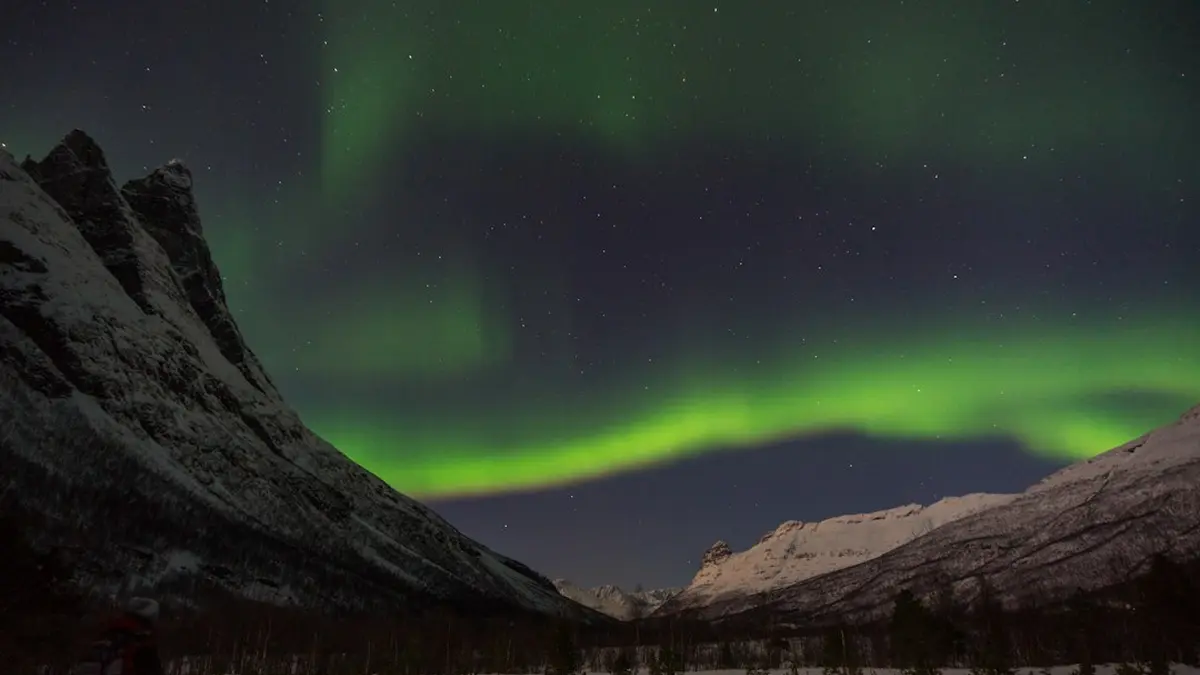
Most nights fall into one of three displays. The table gives a starting point for each, drawn from the sources above. Aperture and white balance stay the same across all three.
| Setting | Faint or static glow | Moderate, vibrant arcs | Fast, dancing curtains |
|---|---|---|---|
| What you see | Dim band, little movement, may look gray | Clear color, slow ripples | Rapid pulsing and rippling overhead |
| Shutter | 8 to 20 s | 3 to 8 s | 0.5 to 3 s |
| ISO (full frame) | 3200 to 6400 | 3200 to 8000 | As high as stays clean, up to 12,800 |
| ISO (crop sensor) | 3200 to 6400 | 3200 to 6400 | 6400, accept a darker frame |
| Aperture | Widest available | Widest available | Widest available |
| White balance | About 3500K | About 3500K | About 3500K |
The shutter ranges come mainly from Capture the Atlas (8 to 12 seconds for faint, 3 to 8 for vibrant, 0.5 to 3 for very active aurora). Other sources run longer. DPReview starts at 5 to 10 seconds and drops to 3.2 seconds for fine structure. Van Nieuwenhove starts at 20 seconds and goes to 5 to 10 for dancing aurora. The crop-sensor column is the one with a real limit: at 6400 and a one-second exposure there is no ISO left to use, so the frame will be darker and needs lifting in RAW.
The Kp forecast tells you which column to start in. NOAA describes Kp 0 to 2 as "far north, quite dim in intensity, and not very active," which is the first column. Kp 3 to 5 brings brighter, more active displays, which is the middle column. As an example, NOAA's 3-Day Forecast issued September 25, 2026 expected a maximum Kp of 3.67 through September 27, driven by a waning coronal hole stream. Under that forecast, a photographer in Lapland or the Yukon would start in the middle column.
The 500 rule and similar formulas calculate how long you can expose before stars stretch into trails. For aurora, treat them only as a check on the longest exposure you will allow. They do not tell you what exposure to use. Aurora movement almost always requires a shorter exposure than the star limit, so the aurora sets your shutter speed. The sources here do not give the formula itself. The one figure they offer is Van Nieuwenhove's warning that exposures beyond about 20 seconds risk visible star trails, which is why the table stops at 20.
A beginner preset is not a universal setting either. Visit Norway's ISO 1600 and 15 seconds is a reasonable starting point on a bright or moonlit night. On a fast display the same settings will blur the curtains.
Set aperture, white balance and RAW indoors, and lock focus on a bright star using magnified live view. DPReview suggests taping the focus ring once it is set. Check your forecast, or one of the aurora forecast apps, to choose your starting column. Once shooting, change only shutter speed and ISO, and check the histogram after each frame, as Capture the Atlas advises, so you do not clip the brightest curtains. If you shoot a crop-sensor body, set 6400 as your ISO limit before you go out, so you are not tempted to push past it when the sky gets busy. Capture the Atlas also recommends turning off in-camera long-exposure noise reduction, because it slows you down between frames. DPReview says it doubles exposure time per frame during time-lapse sequences.
Tripods, cold batteries, composition and timing are covered in the full aurora photography workflow.
Aurora Photography for BeginnersOne email a week with what we published. No spam, nothing sold, unsubscribe in one click.
Comments
No comments yet. Be the first to comment!
Leave a Comment